Cauliflower Rice Jambalaya
Cauliflower rice is a great substitute for regular rice in this delicious keto Cajun classic.
Real Recipes for Real Families
Cauliflower rice is a great substitute for regular rice in this delicious keto Cajun classic.
Crispy fried chicken with a keto breading, topped with ham, swiss, and a quick and simple “honey” mustard.
I’m sure a lot of you have seen and used one of the recipes for 90-second bread that have been floating around Pinterest. The basic idea is that you whisk together some simple ingredients and put it in the microwave for a minute and a half, and voila, you have bread! It’s not the easiest bread to work with, but it definitely works in a pinch. One of its best applications is a grilled sandwich, like a grilled cheese or a panini, because the outside will crisp up nicely and it tastes a bit less eggy afterwards.
Enter the idea I had. What if I could add one simple ingredient and get something that resembles rye bread? Most of the flavor of a good seeded rye comes from the caraway seeds rather than the rye flour itself. And that one little addition opens up so many other potential combinations. I’m definitely going to have to try a reuben or a nice pastrami sandwich. But for now, I’m going with one of my favorite old-school diner favorites, the patty melt.
Start off by using your favorite 90-second bread recipe. I used the one from Wholesome Yum but if you have one you like better, that’s fine. Mix together the ingredients in a flat-bottomed container that is approximately the size of a slice of bread. Just remember to add a half teaspoon of caraway seeds to it before you microwave it, mixing them in thoroughly. Microwave it for 90 seconds, then set it aside to cool.
Fry up 2-3 ounces of mushrooms over medium heat in a teaspoon of butter until they brown and release most of their liquid. Set those aside in a small bowl. While the mushrooms are cooking, first slice up 1/4 of a large onion French style into long strips. Make a patty out of 1/3 pound of 85/15 or 80/20 ground beef, pressing it to be as thin as you can get it. Salt and pepper both sides, then put it into the pan where the mushrooms were, using medium-high heat. Place the onions into the pan around the beef patty. Since I had a pound of ground beef to use, I made 3 of these when I did this recipe. One for me, one for my non-keto husband, and one for leftovers.
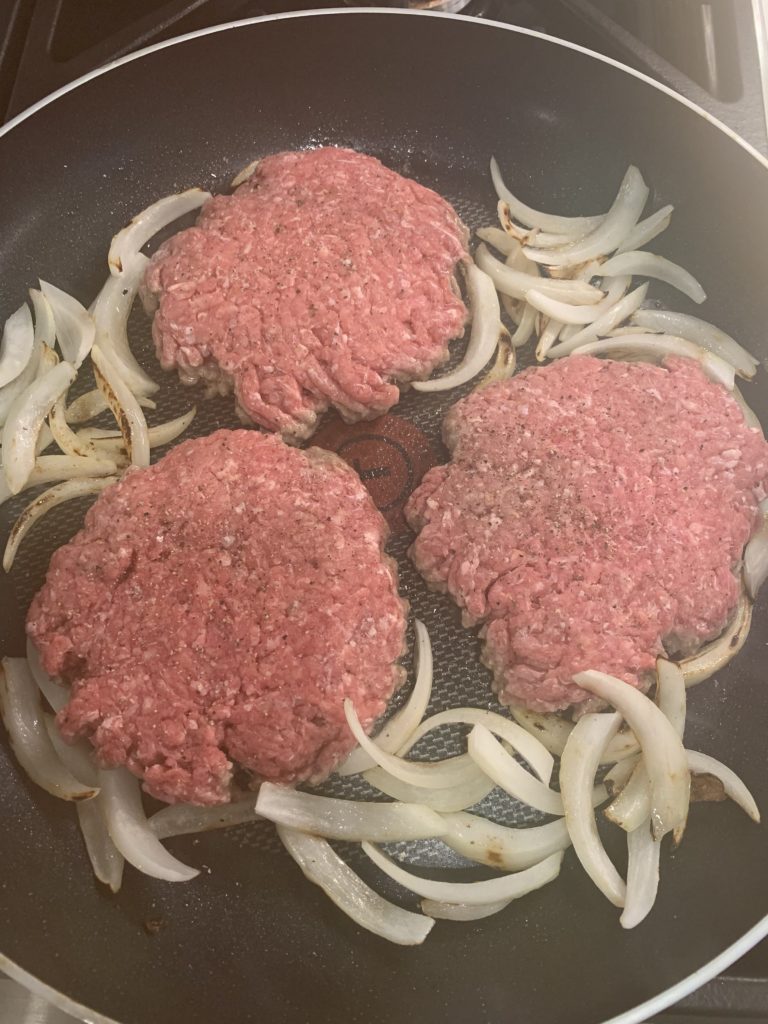
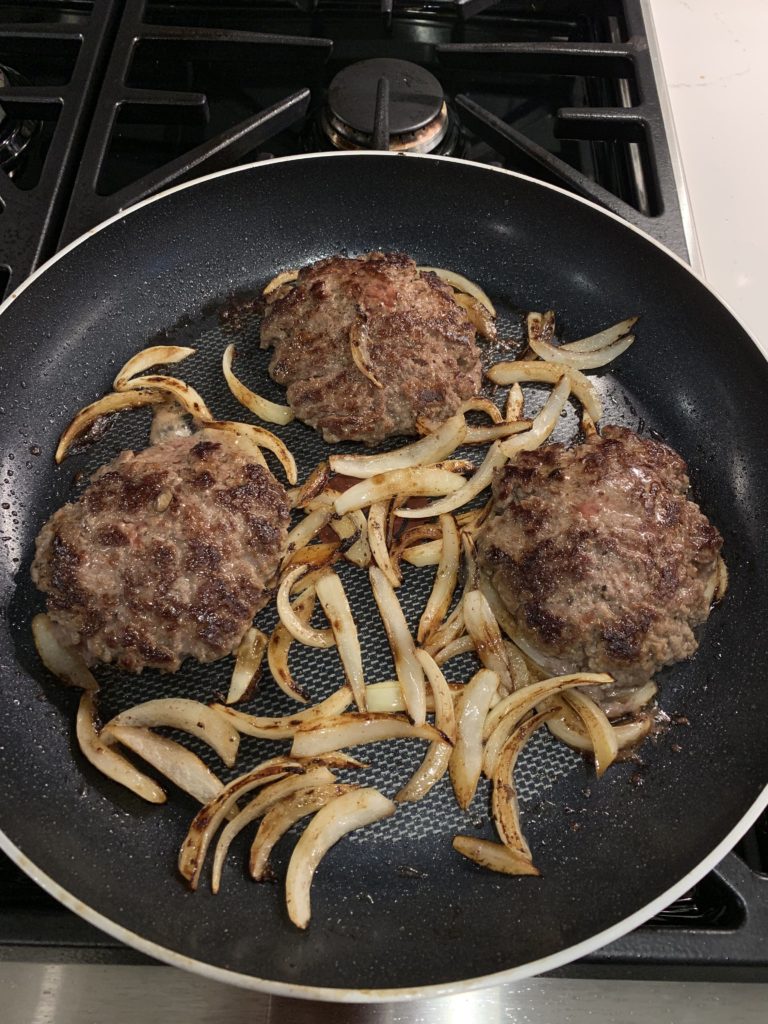
By the time that the burgers are ready to be turned, they should be releasing enough fat to help cook the onions. You’ll want them to be nice and caramelized, and the burgers to be cooked all the way through. Normally I like my burgers cooked medium-rare, but not so much with the patty melt. Eventually, when it’s finished, it’ll look something like this.
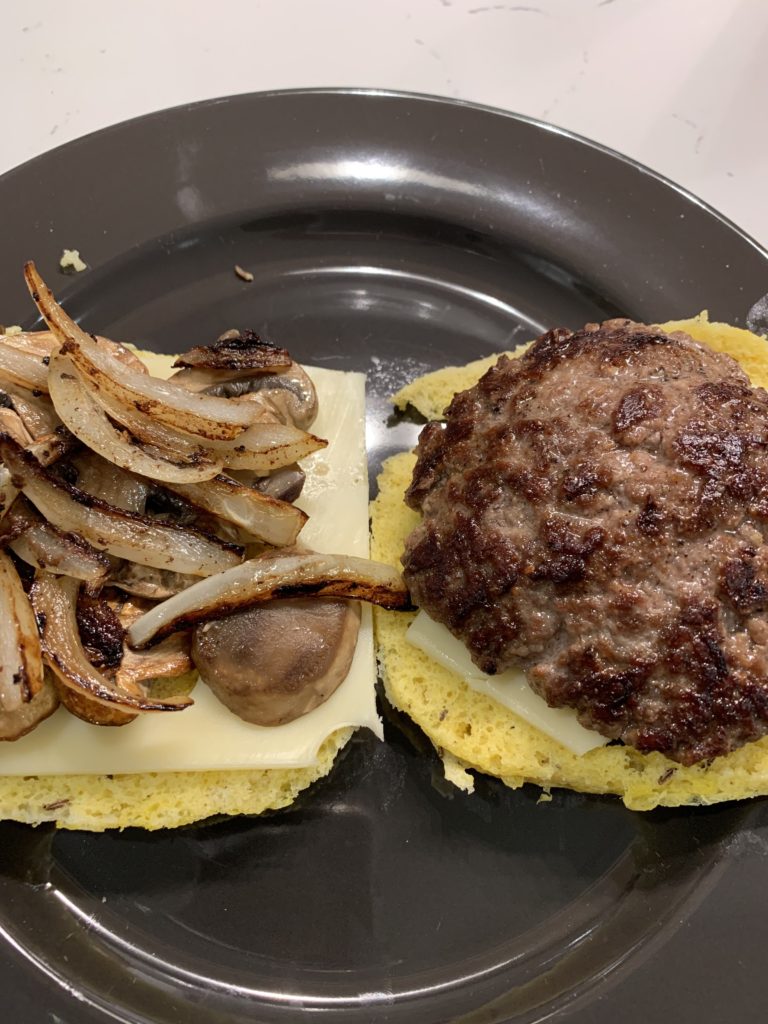
When the burgers and onions are cooked all the way through, assemble the sandwich. Carefully slice your bread lengthwise down the middle to make two slices. Place the patty on one side with half a slice of Swiss cheese under it, and a slice of Swiss cheese and the onions and mushrooms on the other. Put the sandwich together, being careful not to let any of the fillings spill out.
Melt a tablespoon of butter in the skillet over medium-low heat and fry for 2-3 minutes per side, until the cheese begins to melt. The fillings will try to escape again when you turn it, fair warning. The half slice of Swiss cheese under the patty should help a little, but it won’t be perfect. If you’re having trouble getting the cheese to melt, put a lid over the pan for 30 seconds or so.
While the sandwich is browning, mix together a tablespoon of mayonnaise with a teaspoon of sugar-free ketchup. I use the G. Hughes variety, but there are several other good ones out there if you can’t find that one. They also make a good sugar-free barbecue sauce as well. Add a half teaspoon of dill pickle relish, and you’ve made Thousand Island dressing. Use that for a dipping sauce. My zucchini chips would be a great side dish for this if the sandwich isn’t enough for you.

As an Amazon Associate I earn from qualifying purchases. Any embedded link to a product earns me a portion of the purchase price if you click and buy it.
Sweet, salty, spicy, crunchy — this keto poke bowl with a quick-seared tuna has all your favorite things!
A quick and simple keto peanut butter fudge that takes only a few minutes in the microwave to cook. A dessert that’s also a fat bomb!
A western omelet is one of my favorite things to order when I’m eating out for breakfast, but it’s not exactly convenient for my make-ahead breakfasts. And while egg cups are a thing that have been on the keto and paleo train for ages, I hate how they sometimes stick to my muffin tins no matter how much I grease them. My daughter likes to eat ham and cheese sandwiches every day for her school lunches, so we always have some deli ham around. I came up with the idea to use the ham as almost a sort of cupcake liner. They look like…flowers…when I put them in the muffin tins, hence the recipe title.
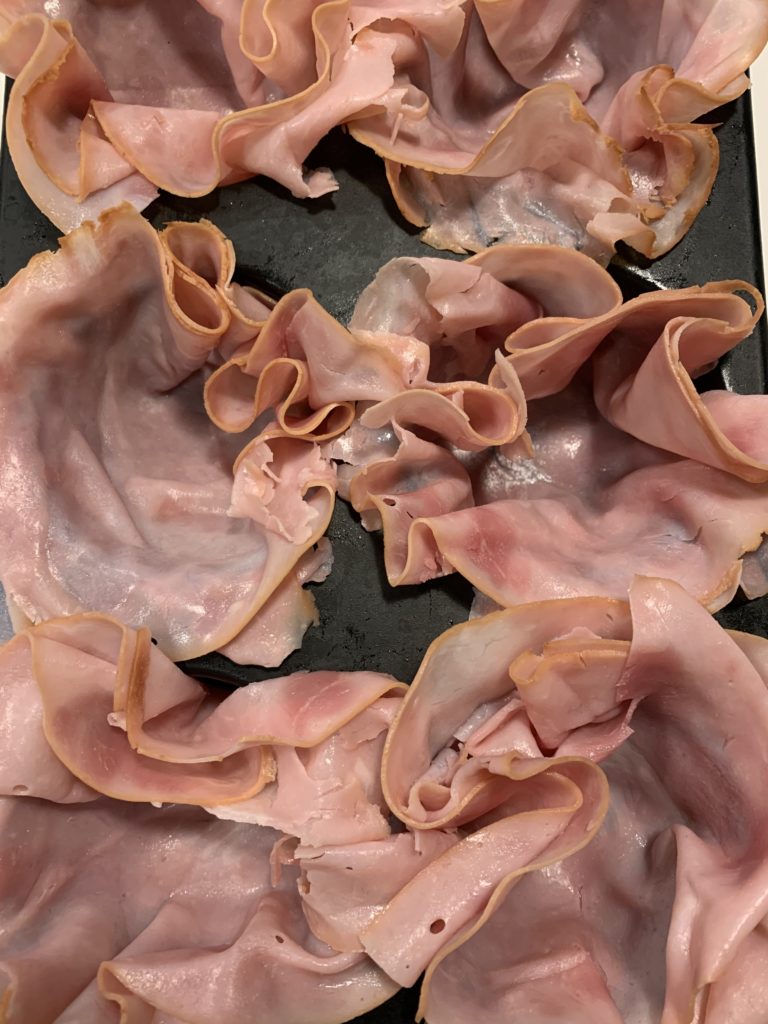
To get started, dice a small onion and a whole green pepper, and saute them with a tablespoon of butter until the onions get soft and begin to turn golden. While you’re doing that, line your muffin tins. To make 12 muffins, you’ll need 24 thin slices of deli ham. You’ll want them to just barely be able to hold their shape without falling apart. Place two slices in each muffin, making sure that if there are holes, they’re not aligned on top of one another. This will avoid most leakage. When it’s done, it’ll look something like this.
When the peppers and onions are finished, remove the pan from the heat and let them cool while you work on the eggs. Beat 8 eggs together with 1/4 cup of heavy cream, about 1/4 teaspoon of salt (a pinch more if your ham isn’t very salty), and white pepper to taste. Mix in the cooked vegetables. Ladle the egg mixture into each cup, filling about 3/4 of the way to the top of the tin (NOT the top of the ham!). Sprinkle them with 3/4 of a cup (about 3 ounces) of shredded sharp cheddar cheese.
Put them into a preheated 325-degree oven for about 10-15 minutes, until the eggs just start to set and the ham begins to brown a bit around the edges. Take them out of the oven and tent them with aluminum foil, being careful to leave room for the eggs to expand. You may want to spray the inside of the foil with cooking spray just in case. Put them back in the oven for another 10 minutes, then remove the foil and let them bake for another 5 minutes. In the end, you’ll end up with a breakfast that reheats well in the microwave, perfect for your work week.

As an Amazon Associate I earn from qualifying purchases. Any embedded link to a product earns me a portion of the purchase price if you click and buy it.
An authentic keto Texas chili with no tomatoes or beans.
Exit bagel, enter eggs! If you like a good everything bagel with lox, here’s a keto adaptation that turns it into a frittata.
OMG, y’all. I started this whole thing on a complete whim because I was craving Mexican food hardcore. And yes, I know that 99% of my recipes start that way, but I seriously was not expecting it to be one of the best things I’ve ever made. There are some things I’ll try slightly differently next time, and if I like them, I’ll tweak the recipe a little. But holy crap, these are good. If you love cheese enchiladas, you won’t miss the tortillas at all.
Won’t miss the tortillas? Then what is that in the picture? Guys, it’s just deli chicken. Turkey would probably work too, but I wanted the flavor and texture of chicken. Get it fairly thickly-sliced, because too thin and it’ll fall apart. You’ll need 10 thick slices for this. You may want to get a few extra just in case they fall apart. It was probably around a pound and a quarter or so.
First, start with the sauce. If you’re busy or just feeling lazy, get one of those 8 ounce bags of Frontera red enchilada sauce. They’re good, fairly low in carbs, and nobody will judge. But if you want to do something different, make your own. It’s actually much easier than I though it would be, to be honest.
Put 4 dried guajillo chiles and 8 dried chiles de arbol in a saucepan and cover with 3 cups of chicken broth. Use one of those 4 cup boxes of chicken broth, because you’ll likely need a bit more of it later. Bring to a boil, then turn it down to a simmer and cook for 20 minutes, turning the peppers every five minutes or so, until they’re nice and soft.
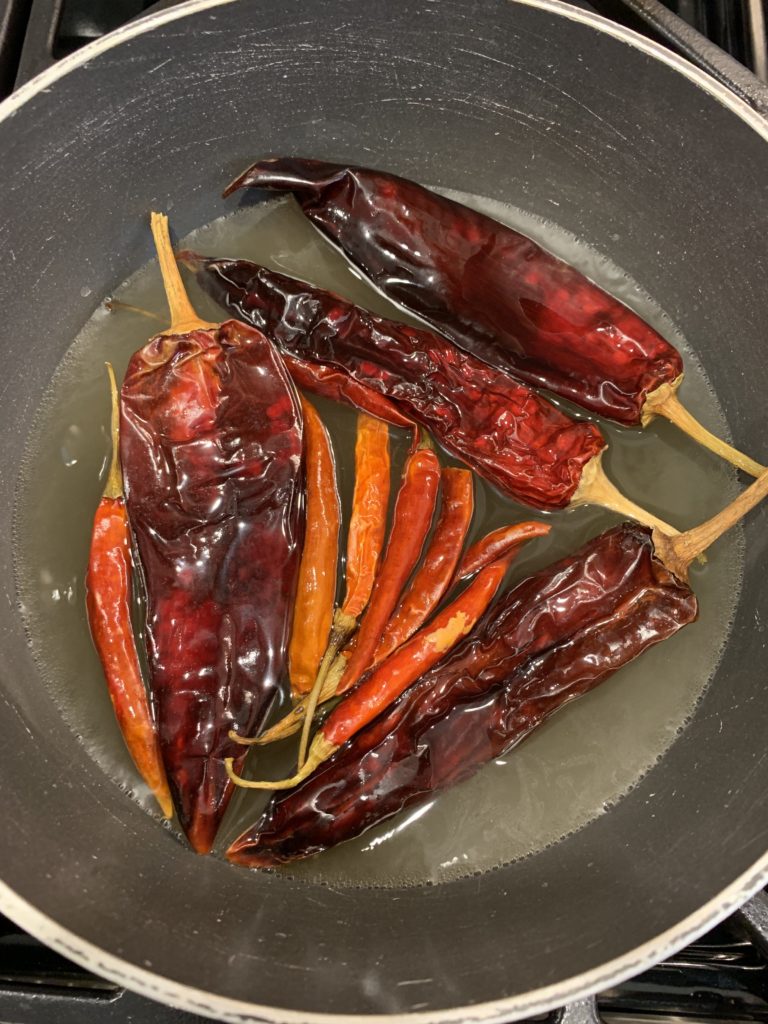
When the chiles are soft, remove them from the pot, take off the stems, and toss them into a food processor. Pour the hot broth into a 2-cup measuring cup. If you have two cups, great. If not, add more chicken broth until it hits the 2-cup line, then put it into the food processor too. Next time, I’ll wait until my garlic is cooked and put it in there too. I just forgot this time. Whiz it up until it’s as smooth as you can get it. Chunks and seeds are unavoidable.
In the same saucepan, heat up 1 tablespoon of avocado oil and toast about a tablespoon and a half of minced garlic until it begins to turn golden. Put a fine mesh colander on top of the saucepan and pour the contents of the food processor into it, pressing down on the top with a wooden spoon to make sure all the liquid gets out. Discard the remaining pepper skins and seeds. Add a tablespoon and a half of apple cider vinegar and a half-teaspoon of salt. Continue to simmer and reduce for about 5-10 minutes, stirring frequently, then sprinkle a half teaspoon of xanthan gum over the top of the sauce, 1/4 teaspoon at a time, whisking until it’s incorporated. If it’s thick enough after the first 1/4 teaspoon, you can stop here, but if you like it thicker, you can add another one.
Pour half of the sauce into a 9×13 baking dish. In a medium bowl, combine 8 ounces of shredded sharp cheddar with 8 ounces of a good Mexican melting cheese (I used Chihuahua, but queso blanco or Monterey would also work). Put out your slices of chicken, put about 1/4 cup or so of the cheese into the middle of the slice, and roll it up. Place it seam side down in the sauce. Repeat this until all of the rolls are in the pan, then pour over the remaining sauce, sprinkle with any leftover cheese, and bake at 350 for 20-25 minutes. You may need to put the last two underneath the top 8, as pictured here.
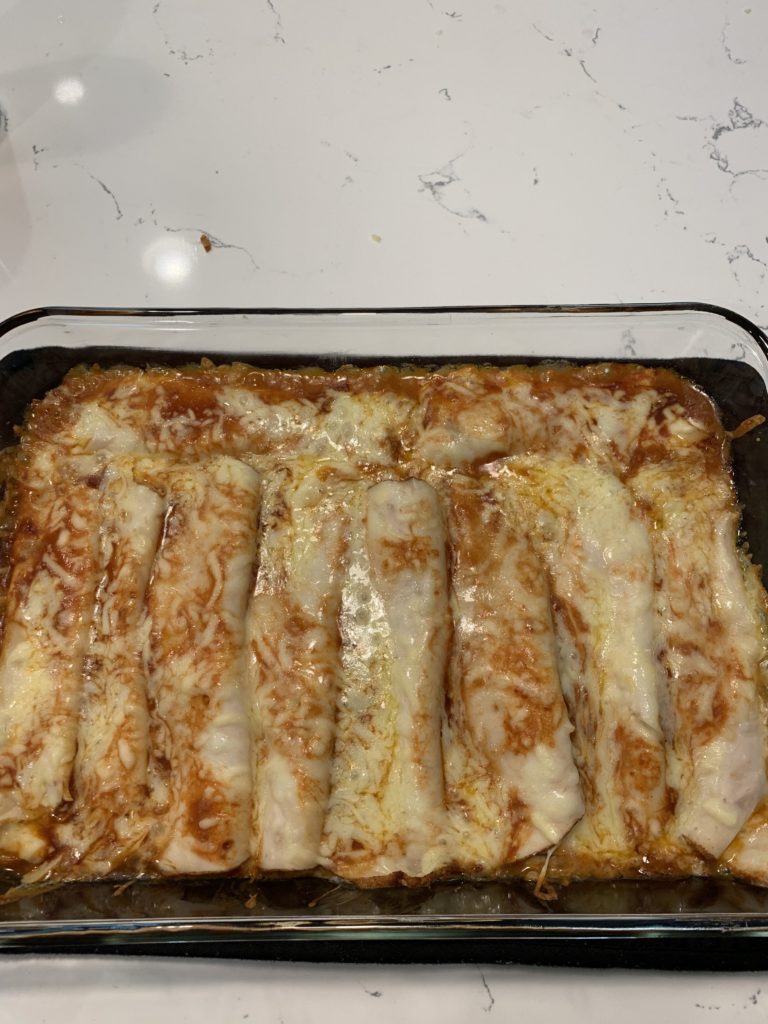
I made this as a make-ahead meal for my lunches this week, so I waited until they were room temperature before I removed them from the pan. I’m not sure how they’d hold up if you were taking them right out for dinner, so if you try this, let me know! In the meantime, I’ll keep trying to figure out a good substitute for refried beans.
As an Amazon Associate I earn from qualifying purchases. Any embedded link to a product earns me a portion of the purchase price if you click and buy it.
A delicious, crispy keto snack. Who needs potato chips when you have zucchini!
Recent Comments