Sous Vide Char Siu Pork Belly
A tender and succulent pork belly with a sweet Chinese barbecue marinade, sous vide braised and finished on the grill.
Real Recipes for Real Families
A tender and succulent pork belly with a sweet Chinese barbecue marinade, sous vide braised and finished on the grill.
This savory and creamy low carb Italian sausage and pepper soup takes only 30 minutes to prepare and is perfect for a chilly fall day.
I’ve been on a kick of trying to make keto versions of regional food, especially now that the chaffle craze has made it so I can make a decent sandwich now. I’ve made Hot Browns, Nashville Hot Chicken, Biscuits and Gravy, and Beef on Weck so far, among other things. What’s your favorite food from where you live? Let me know and I’ll try to make it.
I used to do a lot of tailgating for college football, and we’d try to do a theme around the food from our opponents. Wings from when we played Buffalo, West Virginia dogs, that sort of thing. For the Nebraska game, we made Runzas, which are sandwiches made of bread stuffed with a beef and cabbage or sauerkraut mixture. Fairly simple, but it won’t work with chaffles because it’s a stuffed sandwich. That’s where the fathead dough comes in. Fathead dough is made with melted mozzarella and cream cheese combined with almond flour and egg. The cheese gives it a stretchy texture almost like actual dough. I’ve seen people use it for almost everything, even sweetened and turned into pastry! It works really well for stuffing things, so you could easily make things like empanadas with it. Or, in this case, recreating an old tailgate food.
This recipe makes a dozen sandwiches. Fathead dough freezes pretty well, so if you’re not making these for a crowd, feel free to pop your extras in the freezer and save them for a week where you don’t have time to make lunches for yourself. Just make sure you thaw them out before you reheat them.
Start by preheating your oven to 400 degrees Fahrenheit. You’ll need a couple of cookie sheets, which you’ll be rotating in and out of the oven one at a time. You can only really fit three of these per sheet unless you want to risk tearing them as you transfer them onto the sheet. So prepare those by lining them with parchment paper, and setting them aside for now.
In a large, deep skillet (like this one) over medium heat, saute one medium chopped onion (about 3/4 cup total) in a bit of avocado oil spray until it starts to turn golden brown. Turn up the heat to medium high and add a pound and a half of ground beef, two teaspoons of salt, a half teaspoon of garlic powder, and way more black pepper than you think you’ll need. Break the beef up into pieces as small as you can. When it’s fully browned, drain off the fat. You want it to eventually be as dry as possible, otherwise it’ll be soggy once it’s cooked. Once it’s drained, return it to the pan and add a bag of angel hair slaw. Mine was ten ounces. If you can’t find it in bagged form, just thinly shred a head of cabbage with a food processor or chop it as thin as you can get it. Put it in the pan, add at least another teaspoon of salt and even more black pepper, and cook it, stirring frequently, until the cabbage is cooked and all of the liquid from it has evaporated. If it’s just starting to stick to the bottom of the pan, you’re in a good place. Remove it from the heat and let it sit to cool while you make your dough.
For the fathead dough, you’ll want to make it in two batches, because the dough will lose its elasticity as it melts and you won’t be able to get everything done before that. Start with 12 ounces of mozzarella cheese and 2 ounces of cream cheese. Put it in the microwave for 30 seconds on high, take the bowl out, and stir. Put it back in and repeat in 30 second increments until the cheese is melted into a ball. Be careful not to burn it! In my microwave it usually only takes a minute. When the cheese is nice and melty and stretchy, add 6 ounces of almond flour, two beaten eggs, and two teaspoons of baking powder. Stir with a spoon at first, but eventually you’ll probably need to get your hands dirty. Spray them with oil to avoid sticking. Once everything is well-mixed, divide it into two equally-sized balls, and then divide each one of those into three equal parts. This will end up making six sandwiches.
Go back to your parchment-lined cookie sheets and put three of your small balls on it. Flatten each one out until it’s thin and about 6 inches in diameter. You’ll want to spray your hands with oil to do this, otherwise your hands will stick. Once you have the three circles ready, work on the filling. Using a slotted spoon, put about 1/2 cup of filling on one side of the circle. Make sure any liquid is drained before you put it on your dough. Once you’ve added the filling, fold the other half of the circle on top and line up the edges. Using the back of a fork that you’ve sprayed with cooking spray, press the tines against the edges of the dough to seal it up, then prick holes in the top of the dough four times so that steam can let out when they cook. If the fork starts to stick, just keep spraying it. I found that one spray would work to complete one sandwich.
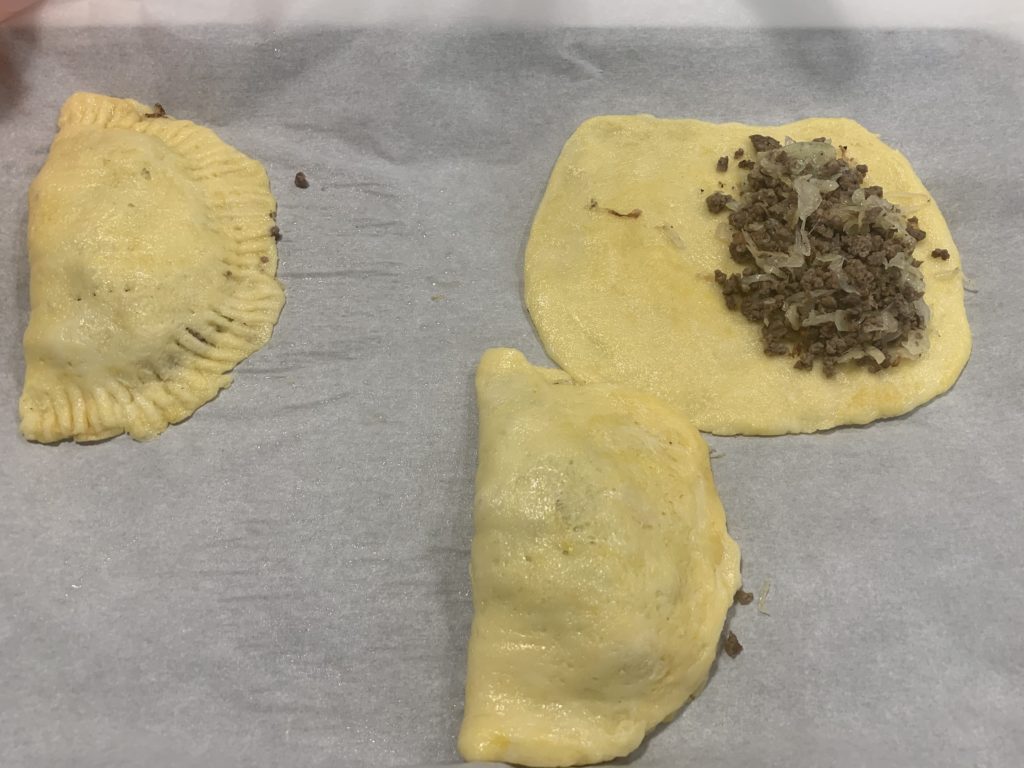
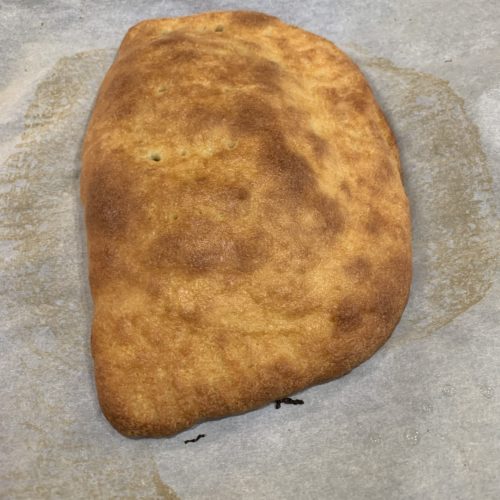
Put the three stuffed and sealed runzas in the oven for 12-15 minutes, until they’re golden brown. While they’re cooking, repeat with the remaining three balls on your second prepared cookie sheet. You should finish with plenty of time. Once the first batch is out, put the second batch in, and move the first runzas to a cooling rack or to a warmer if you want to serve them all immediately. Let the cookie sheet cool while you make another batch of fathead dough. This time, form the runzas on a piece of parchment paper on your counter, and move the parchment paper to the cookie sheet, so it has time to finish cooling and won’t melt the dough while you’re working with it. Keep doing this until you’ve made all 12. Enjoy your keto Nebraska tailgate, or just do what I did and make them for lunches!

As an Amazon Associate I earn from qualifying purchases. Any embedded link to a product earns me a portion of the purchase price if you click and buy it.
A Thai-inspired low carb sauce great for serving over grilled or pan-seared meats, or poaching any type of seafood.
All the flavors of a Reuben sandwich from your favorite deli, in breakfast form! This make-ahead reuben frittata is a great low-calorie breakfast treat.
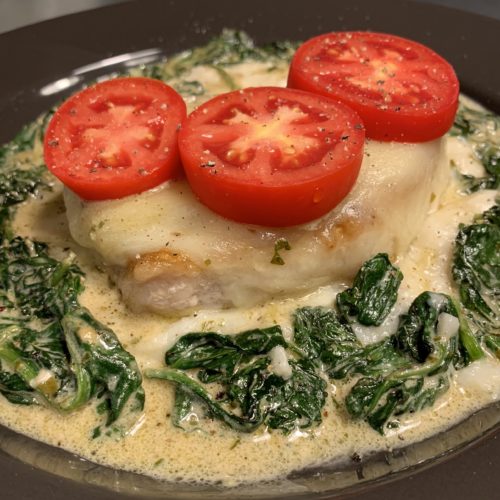
This was one of those throw-together recipes that was borne from my general laziness. I was planning on making something with spinach last Thursday, but was so exhausted that I made it a breakfast for dinner day instead. That led to me never actually making the thing I was going to make with spinach. I had some pork chops in the freezer that I wanted to use for another recipe, but I was only going to use half of them. So I needed to come up with something using pork chops and spinach. I still had several tomatoes from our garden that needed to find a home as well. Add some basil pesto and some cream, and an idea was born.
This is a really simple recipe, which is nice for a Sunday night after I’ve been cooking all day and stressing over the Bills game. It only has a few ingredients and comes together in less than 20 minutes. It goes perfectly over frozen mashed cauliflower, so you don’t need to worry about sides. And finally, it’s only 4 net carbs per serving, with really high protein, so it’ll fit well into pretty much any macros.
Start with a stainless steel skillet. I like stainless here because it promotes browning, which is important since the chops have a fairly short cook time at first. Heat it up to medium to medium-high heat and use 1/4 cup of whatever oil you like, as most of it will end up getting poured off before the next step. I used olive oil and butter for flavor. Be careful not to hit the smoke point if you do that, because it can quickly go from delicious to gross. Err on the side of lower heat. For an easier time, use avocado oil. Salt and pepper two pork loin chops (about 1/2 pound total) and fry them in the oil for 3 minutes per side. You should be just developing a nice brown crust on both sides. When the chops are browned, remove them from the pan and pour out the cooking oil.
Return the pan to the heat and add 5 ounces of baby spinach, along with about 1/2 teaspoon of salt. Toss the spinach until it’s just wilted, then add 1/4 cup of heavy cream and 2 tablespoons of prepared basil pesto. Stir it until the pesto and cream combine. When the sauce starts to bubble, turn it down to a simmer and add the pork chops back to the pan, with the ugliest side down. Top each chop with 1 slice of provolone cheese, then put a lid on the pan for three minutes to melt the cheese. I use this awesome vented universal lid for my pans, since it fits everything from 7 to 12 inches in diameter.
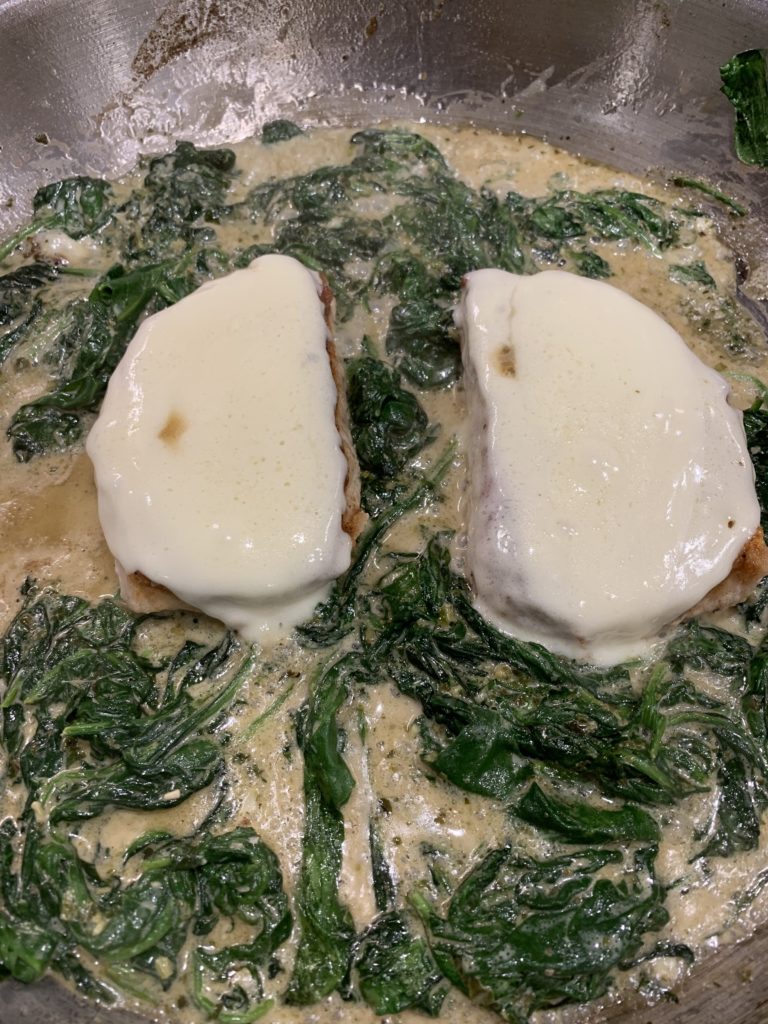
To serve, put a serving of mashed cauliflower on the plate, then spoon the sauce evenly around it. Place the pork chop on top of the cauliflower, then top with tomato slices or chopped tomatoes. I used slices because I had two Roma tomatoes that I needed to use up, but if you don’t have Romas, one medium chopped tomato should be good for two pork chops. Top with more salt and pepper and you’re good to go.

As an Amazon Associate I earn from qualifying purchases. Any embedded link to a product earns me a portion of the purchase price if you click and buy it.
An open-faced turkey sandwich on a keto chaffle with tomato and mornay sauce, broiled until brown and bubbly, then topped with bacon.
A spicy, creamy, cheesy keto soup with the flavor of jalapeño poppers, made in the Instant Pot. Perfect for a chilly fall afternoon!
I can’t make this recipe without getting that Nationwide jingle with Peyton Manning stuck in my head, so now you have it stuck in your head too. I’m just that kind of person. But all earworms aside, this is one of the most kid-friendly meals I make. Both of my kids love it, which is saying something because they have vastly different tastes. It’s also really versatile. You can serve it over zoodles, Miracle Noodles, hearts of palm noodles, or regular noodles if your family isn’t keto. Last night, I made myself a couple of chaffles and the family ate theirs on sub rolls.
It’s not a tough recipe to make, either. Last night I had to hit the gym, pick up the girl child from school, take a shower, and have it on the table before my husband and the boy child got home from soccer practice. And I got it done early, so I had to put their sandwiches in a warm oven to wait for them.
First, preheat your oven to 350 degrees. You’ll get started with 4 chicken thighs or breasts. I’ve done it with both and it turns out well no matter what. Just do what’s better for your macros. You’ll want it to be about a pound of meat total, although if you go over a little that’s no big deal. Too much and you’ll run out of breadcrumbs, so be careful. Pound them to about 1/4 inch thickness and set them aside.
With the chicken prepped, start heating 1/4 cup of oil in an enameled cast iron skillet over medium high heat, so it’s ready by the time you’re finished with the breadcrumbs. Avocado oil is best for frying because of its high smoke point, but I like a little olive oil flavor in this one, so I usually go 3 tablespoons of avocado oil to one tablespoon of olive oil. Once you get that going, start the breadcrumbs. If you’ve read my other recipes, you know how this starts. Mix together 1/2 cup of parmesan cheese and 1/2 cup of pork rind crumbs, then mix in a teaspoon of salt, a teaspoon of Italian seasoning, a half teaspoon each of garlic powder and onion powder, and however much black pepper you want. Put that on a large plate, then beat an egg in a small bowl. Set the whole thing up next to your stove.
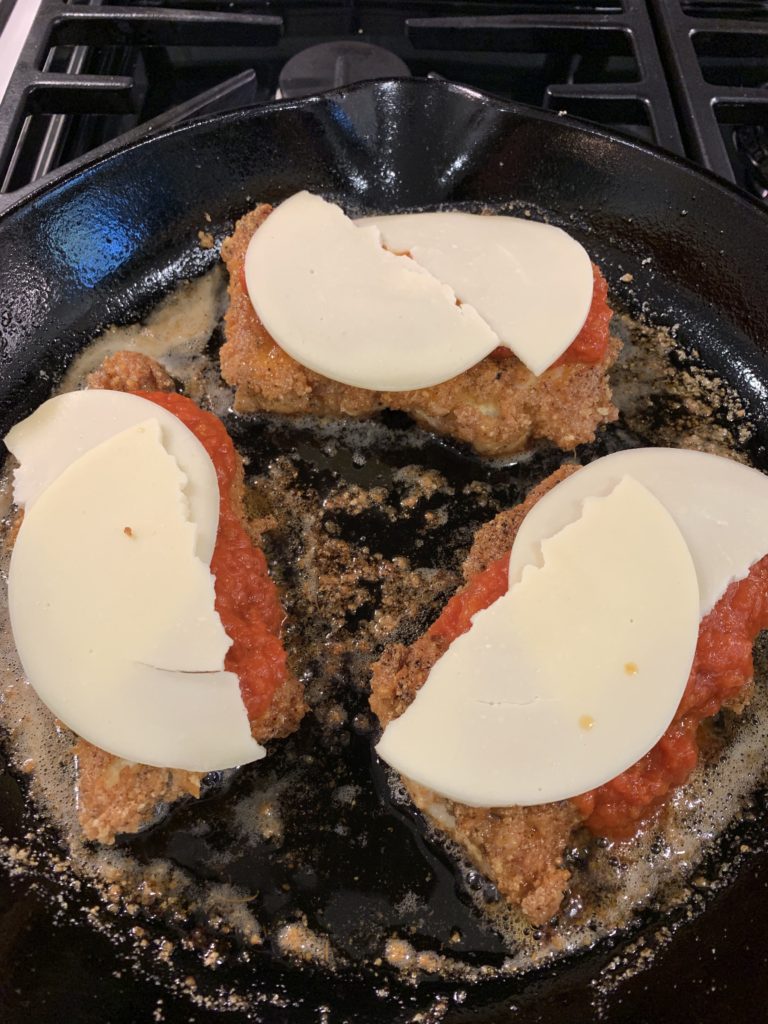
Take the largest piece of chicken, dip it in the beaten egg to coat, dredge it in the crumbs until it’s well-coated, then gently place it into the hot oil. Repeat with the next largest one, down to the smallest. Fry them for about 4 minutes per side, turning them gently with tongs to avoid knocking off the breading, then remove them from the heat but keep them in the pan. Top each with 1/4 cup of marinara sauce, making sure that the sauce you use does not have sugar listed in the ingredients. I prefer the Rao’s brand. Normally I’d link to it on Amazon but their prices are obscene. Go to Costco or shop the sales at your grocery store and stock up when it’s on sale. After you put on the sauce, top each piece of chicken with a slice of provolone cheese. I usually tear the slices in half so I can get them to cover more of the chicken. Once you put the cheese on, put the whole skillet in the preheated oven until the cheese melts, about 10 minutes. Remove them from the oven and serve immediately.
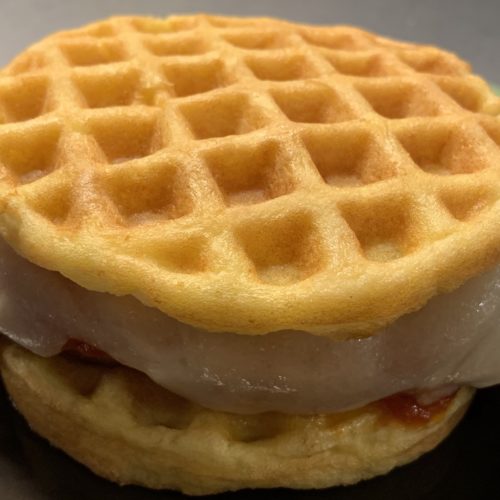
Since I made sandwiches this time, I decided to whip out the trusty Dash and make the recipe for Wonder Bread chaffles I’ve seen going around. It’s just an egg beaten with a tablespoon of almond flour, a tablespoon of mayonnaise, 1/8 teaspoon of baking powder, and a teaspoon of water. Because there’s no cream cheese, you don’t need a blender for it. It turned out okay, IMO. It reminded me of cloud bread. My main issue with it is that it was a bit softer in texture and had some trouble holding up to this type of sandwich, and that it’s a bit higher in calories than most chaffles because of the mayonnaise. I want to try it again replacing the mayonnaise with a tablespoon of cream cheese, and maybe adding 1/8 teaspoon or so of a liquid sweetener like Sukrin Gold Fiber Syrup in order to replicate that hint of sweetness that’s in Wonder Bread. It would be great with some peanut butter and sugar free jelly, though. But I digress.
To serve these, either slap them on your bread substitute of choice, or put them on your pasta substitute of choice. If you use pasta, you may want to add some extra sauce. Just make sure you add that to your macros!

As an Amazon Associate I earn from qualifying purchases. Any embedded link to a product earns me a portion of the purchase price if you click and buy it.
Great for breakfast or dessert, this casserole is made with keto chaffles and a raspberry cheesecake filling, covered in an egg custard and baked.
Recent Comments